Preface
When was 9 years old I used to go to the shooting ground in Kinver (As was Cross Guns Club – Now TJ Hale) most Sunday mornings with my dad. It was my first real experience of shooting and I used to love it, so much so that there came a time where I was bought a shotgun of my own to use every Sunday that wasn’t quite so heavy as the 12g that the club had for me to use.
Dad spent more money on my shotgun than he had of his own, it was a long time ago (almost 2 decades) but I believe it was in the region of £500! To a 9 year old, that’s an insurmountable number!
Fast forward a few years and I remember messing with the shotgun, taking it down and putting it back together. At some point I think I took it apart into action/buttstock, foregrip and barrels and decided it would be a good idea to dry fire it (I was young?!) the ejector pins both popped out and I couldn’t get the for end back on the shotgun. Eventually I did. At the cost of an ejector pin.
I’ve finally come to attempt to fix the shotgun so I can take my girlfriend shotgun shooting without the bruised shoulder that comes with a 12g.

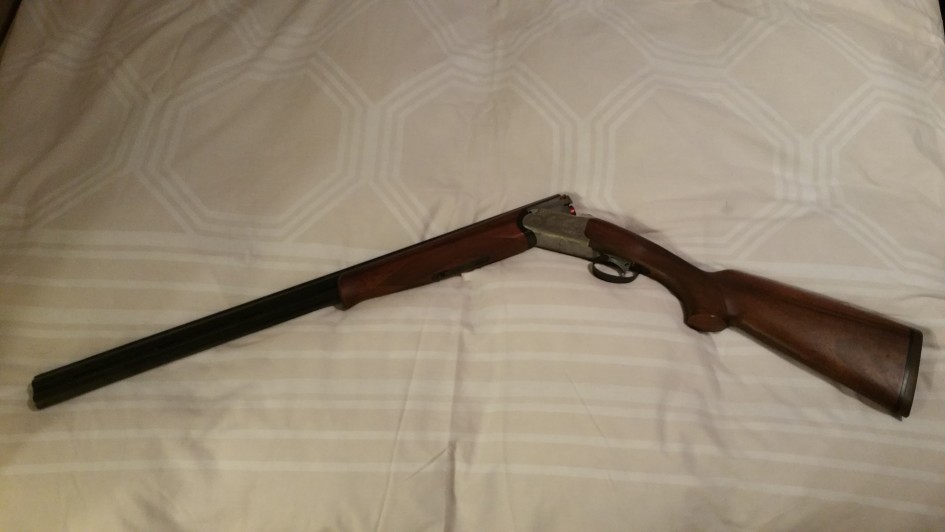
Silma Broken Ejector Pin
Parts
I had tried sending an email showing my problems to Silma however, I didn’t get any response. Maybe it was my bad Italian translation?!
In the mean time I tried to get in touch with gunspares.co.uk who were very helpful, but unfortunately had the wrong side ejector in stock.
I decided I’d try Silma again and gave them a phone call. Fingers crossed they understood English better than I understood Italian! I got through and spoke with a nice woman called Elena who was very helpful. She explained that my emails had not come through to her and gave me her direct address, to which I tried from a couple of different email addresses as I know some of mine do not always work 100%.
Elena talked with the engineers but they couldn’t find any and they were just about to break up for summer holiday, she said she’d get it out to me as soon as they started back in September.
September came and low and behold a cool little package with Silma tape turned up. With more spares than I needed, and without ever being asked for a penny. Absolutely awesome customer service. Thank you Elena.

Broken pin on top, new pin on bottom
Silma Shotgun Stripping Action
I’ve become quite good at taking this shotgun apart now as it’s taken me 3 attempts to get it right. There were some steps I took along the way which were quite un-necessary. I’ll try and only use the relevant information here, but I may not have photos of it all.
First off we’re going to use a pozi-drive screwdriver and take off the recoil pad in the far left hole and the far right hole. The screwdriver rubs the rubber however you do not need to remove any material to remove this piece..

Silma Recoil Pad
This then leaves us with a big hole through the buttstock, through which we can use a long 5mm hex key and remove the butt stock from the action.

Silma Shotgun Action Removed from Stock
We can remove the forend and barrels and be left with the action on it’s own:

Silma Shotgun Action Stripping
We take the pin out of the safety and remove the button which shows us a screw.

Silma Shotgun Safety Removed
Along with the pin shown in this following picture
Shotgun Action Breakdown Pin
Making sure the shotgun break lever is centred we can now remove the trigger/hammer assembly from the action by pulling the upper and lower apart.

Silma Shotgun Action Assembly Stripped
Be careful not to let any pins fall out at this point. This picture is shown without the springs in place. I had taken too much apart and putting the springs back in wrong twice meant that I figured out how to do it, as I’m describing, without taking the springs out at all. I didn’t manage to get a photo though.
At this point you can pull the ejector pins back towards the direction of the hammers and twist them to remove them.
Then you need to put the new one in and put it back together. But not so fast. This was another mistake – it seems that although the parts are standardised, they need some level of fitments to work correctly.
Using the broken ejector as a guide I ground down the new ejector to the same size as the new one, then test fitted, saw where it was catching and ground down some more – repeatedly until the action was smooth in the assembly.
I then did the reverse of what is shown here to put it back together, however I couldn’t get the action to close (I was having flashbacks at this point, thinking I was going to break the pin again!) But I could see that the new ejector was sticking out further than the old one on the other side. Strip it down yet again and grind the back of the ejector pin until it’s the same length as the old one. Check and double check!
I placed the parts back together once more.

Silma Shotgun Action Stripped (note the butt-screw is above the spring retention holes if you remove the springs completely)
Closed the shotgun fully assembled with snap caps in and both hammers fell, a good start. When I cracked open the gun both of the ejectors worked and both snap caps when flying across the room.
Job well done. First time working on a shotgun and can’t wait to get out on Sunday and try it at TJ Hales!
Hope this helps someone out there. It was a little daunting to begin but it seems I quite enjoy working on guns. Stripping them down and rebuilding them seems to be quite therapeutic.


16th November 2020 at 9:39 pm
Hi,
I’ve been looking for parts for my Silma 12 gauge over under but i couldn’t find what i need too. I have tried contacting them but it seems that the business has closed down. Can you give Elena’s email?
Best regards.
13th April 2021 at 12:45 pm
Hi Melis,
Unfortunately I don’t seem to have the email trail any longer. It was a few too many years ago and I appear to have wiped emails from that long ago.
Good luck in your quest!
Ste