Preface
So my dad has this sub 12ft lbs (UK Legal limit without FAC) that for the past few months has been inconsistent in it’s accuracy. It’s a fantastic little rifle and no word of a lie it will shoot an individual blade of grass at 30 yards or so, or for instance, a bumblebee sitting on a clover. It comes with the kind of accuracy that makes shooting a target in your back garden boring, as after the first 3 shots, they’re all going through the same hole!
It makes for a great rifle for new members to Dudley Rifle Club as it’s very accurate, cheap to shoot and as it’s a PCP there is practically no recoil. So when he said it was becoming unreliable and that he was going to take it to an air gun guy to fix, I was intrigued as to what could be wrong.
Fast forward a couple more weeks and all of a sudden the PCP ‘Buddy Bottle’ had mysteriously emptied itself and after filling there was an audible leak. Obviously this needed sorting and all things pointed towards the seals.
On to ebay and £6.50 later a complete set of seals, molykote grease and an additional spare set for free was well on it’s way.
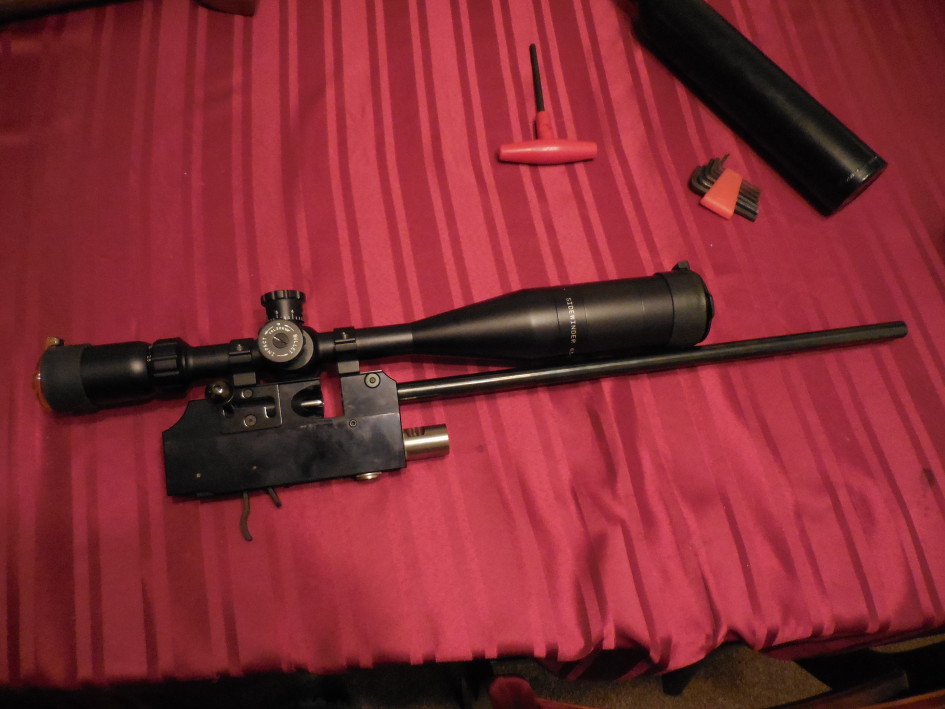
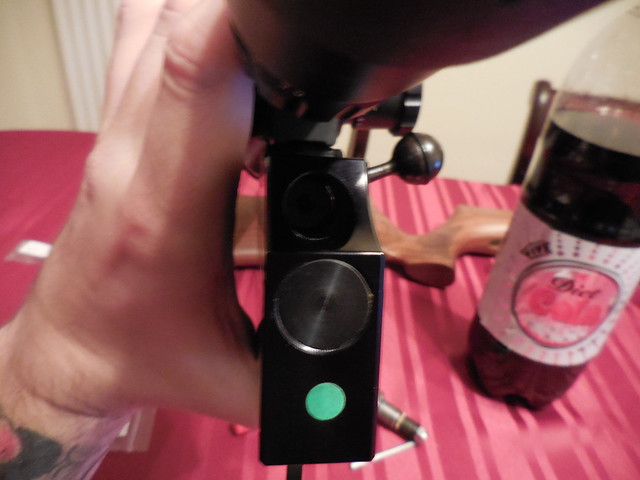
Stripping the Theoben
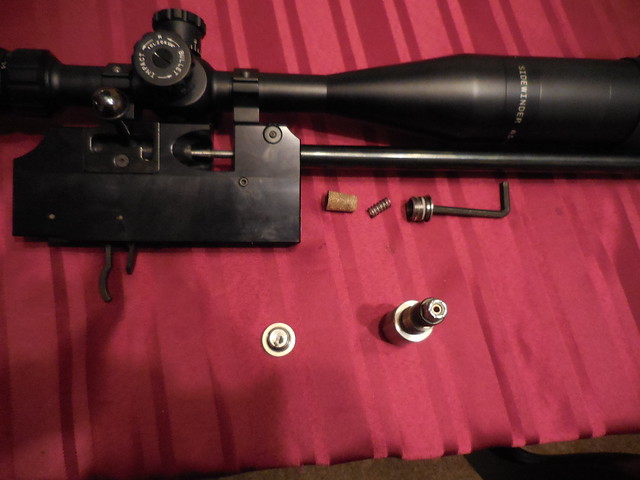
Buddy Bottle Off
Unscrew the buddy bottle.

Action out of the Stock
Take the action out of the stock, this requires a 4mm allen key (Hex Wrench).
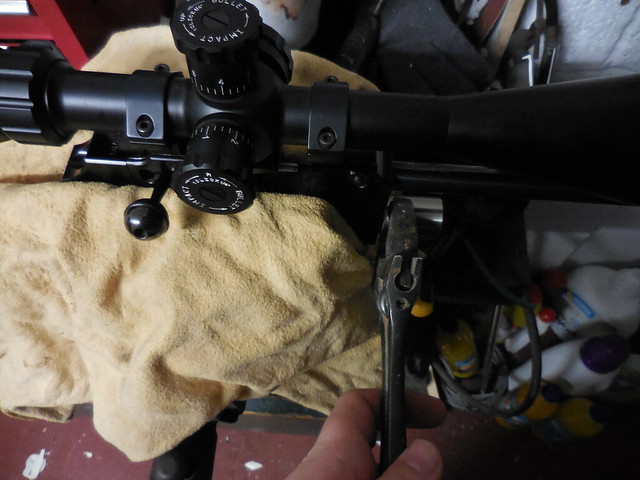
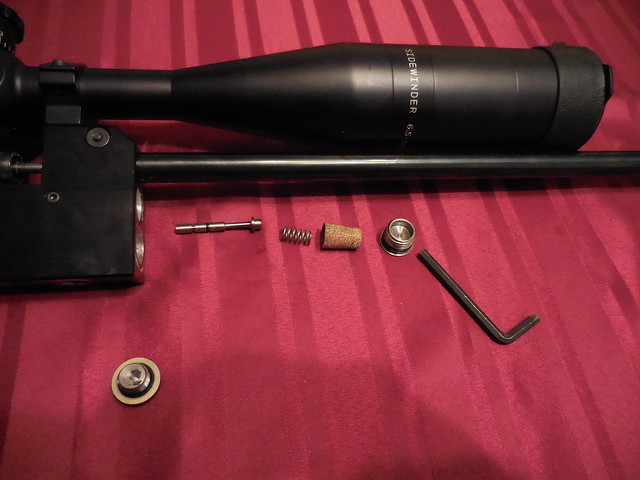
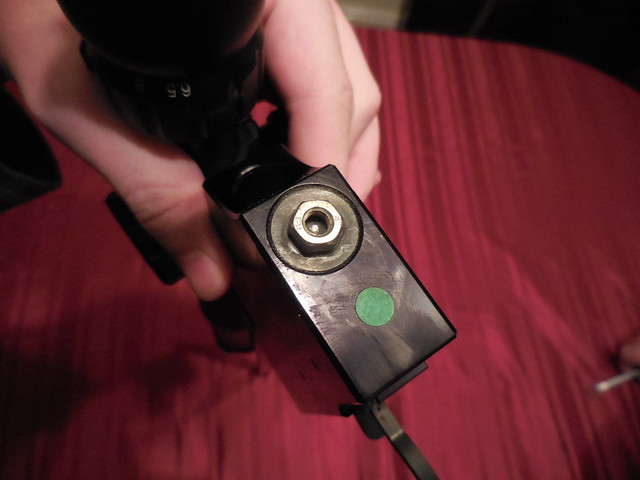
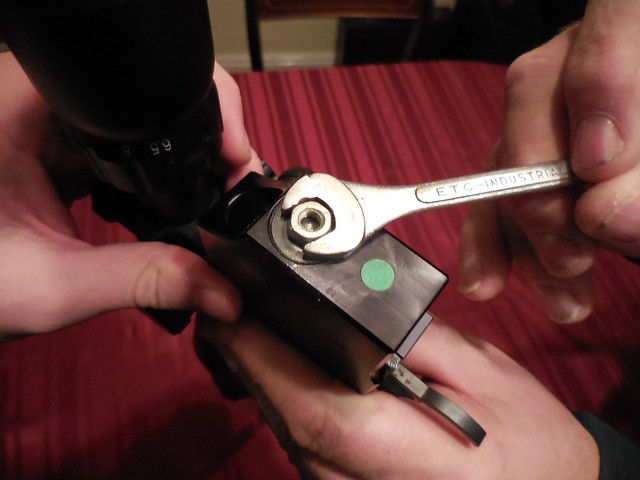
Regulator off
Next off was the regulator valve. This required a 21mm socket, which I didn’t have, but I did have an adjustable one! It was also very tight, so doing it at the dinner table was a no-no. off to the garage to clamp it into the vice. Chamois leather to stop the action being damaged by the metal vice’s death grip!
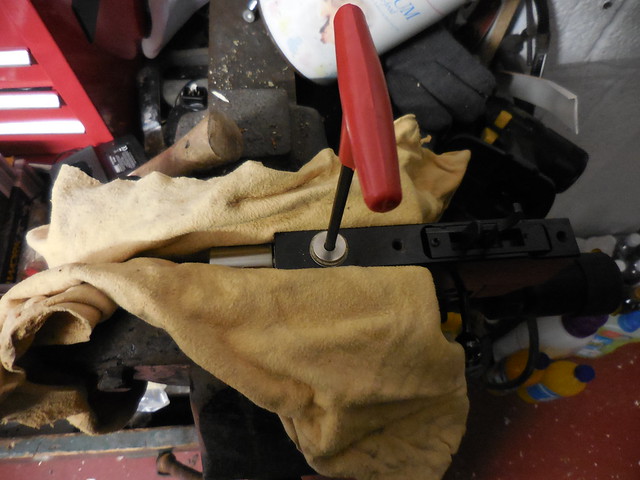
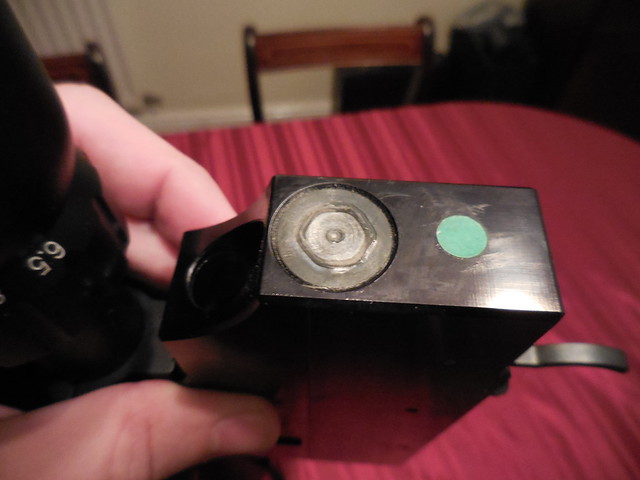
Bottom plug removal
Likewise the bottom plug was very tight. into the vice it goes!
All forward facing plugs out
Out came the third and final forward facing plug. it’s worth noting that the spring goes the other side of the “cork-like” stopper seen above.
Next to get out the valve stem. I cocked and fired the rifle, which made the valve stem jump out of the hole and out of the rifle.
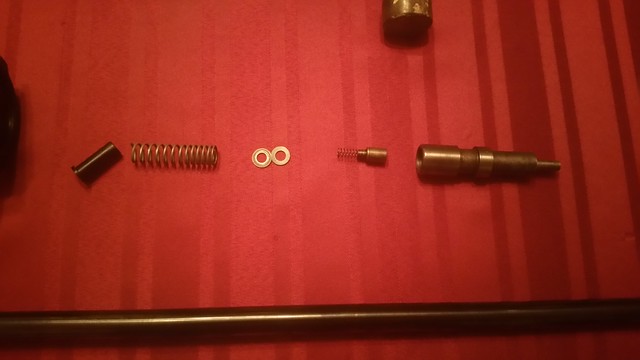
Valve stem out
Parts are this time photographed in the right order!
Next up to get out the exhaust sleeve that the valve stem fits in. The small hex nut seen on the left middle on the block in the photo above had to come out, and it was free.
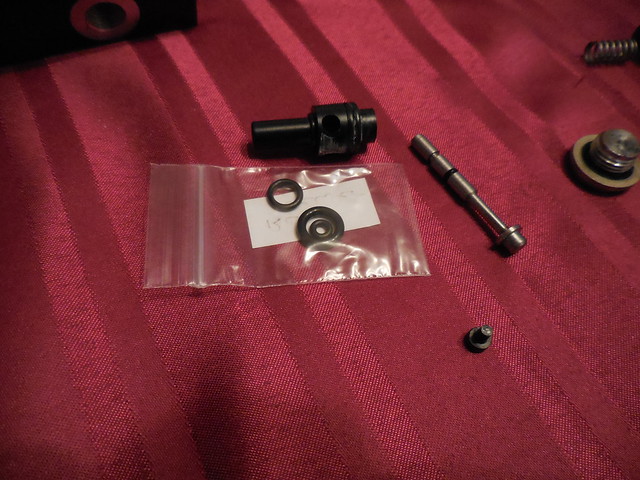
Valve stem and sleeve.
The O-rings seen here are not at all for this part of the rifle. There was white stuff all over the sleeve and inside one hole. I wondered what this was for, and thought it was coagulated grease, but as it turns out it is a locator, so you can see where to screw when re-assembling.
The Problems
Now I was stuck. I’d replaced the seals, greased them, and was ready to re-assemble. But my bolt was stuck forward, and budged hard, like this;
Bolt stuck.
I thought it was strange and I didn’t quite know what had gone wrong, but surely taking parts out would make things move freer not clog things up. So I joined up to Theobin-Rapid.co.uk in a bid to ask for advice. I couldn’t actually find anything when searching for “Stripping Theoben Rapid S” , “Servicing Theoben Rapid S” or “Replacing Seals on Theoben Rapid S”. I was fairly stuck.
Once my account on TR had been approved I could see a lot of information which was hidden to non-members. Infact, I could see pretty much all of the information, none of the website seems to show up at all until you are logged in. Needless to say, a quick question posted and a mooch around and I found a guide, not dis-similar to this blog post, only from someone with far more experience in all things air rifle than I.
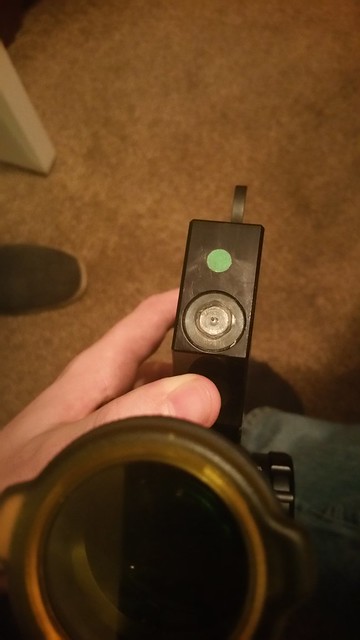
They mentioned that I needed to get the blanking plate off at the back of the action. This is sort of an “anti-tamper” bit to stop people messing. Presumably from here you can do something to increase the power above the FAC limit. As to what that is, I have no idea, nor desire to find out. As an FAC holder I’d rather have a rimfire rifle or fullbore rifle than a high powered air-rifle, but that’s by-the-by. I needed this plate off.
Blanking Plate
So how would I get, what is presumably the same as the front Hex bolted plug off but without the hex bolt.
Solutions
The suggestion of gluing a bolt to the plug with superglue came up on TR. So what harm could it do… I sanded the plate with some rough grit paper and set about gluing on a bolt…
Glued Bolt
With an extra pair of hands we tried easing out the thread with the bolt…
Glued bolt turned by spanner
The nut seemed to hold a lot more torque than we anticipated, but alas it was not enough. it was in there solid and this method was not going to work…
Failed. Doh!
Back to the drawing board. But as it turned out, we were trying this to not have to modify the blanking plate, but our fall back plan was always to do what follows, which is to drill through the blanking plate to see the hex socket beneath.
Again, back to ebay on the advice of my dad who has a vast background in engineering to buy Center Drills which I’d never heard of, but obviously being in the industrial trade my dad had! (Every days a school day!). Anyway, they make it easier to drill concentric holes.
Note: From here on out the picture quality changes. I bought a new Galaxy Note 4 and the remainder of the photos were taken with this. However I forgot to take off the protective plastic over the lens. Doh!
Begin drilling, centre marked with centre punch.
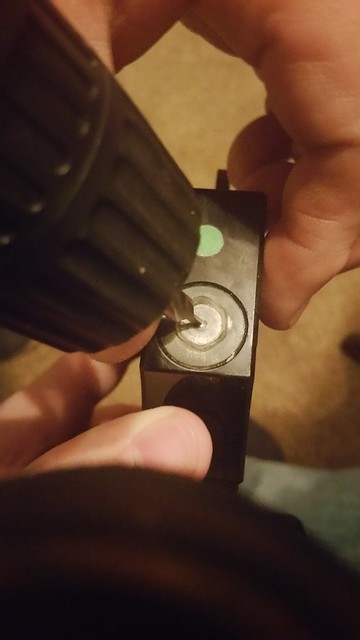
Centre Drill Lined up
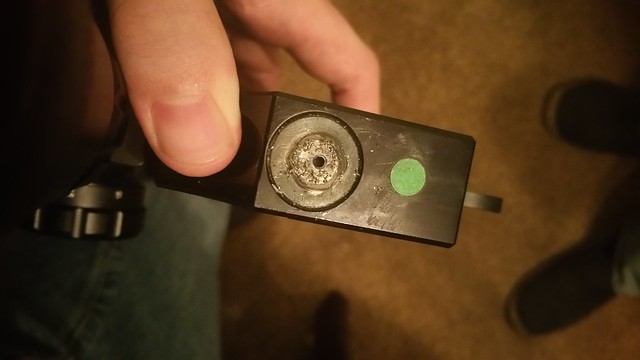
And we’re through…
Next up was to widen the hole, we used the biggest drillbit we had that would fit in the electric drill chuck.
Whizzzzz

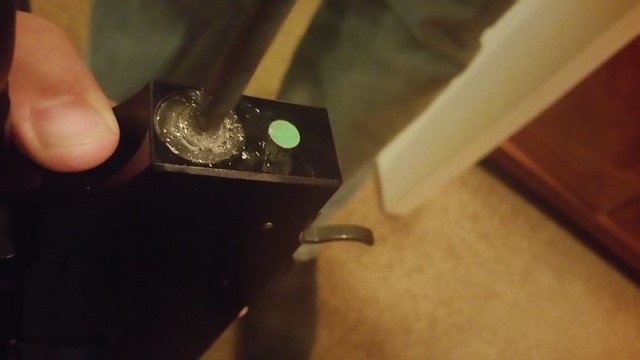
Our hex key now fits!
So off comes back plate unscrewing with the hex socket that is hidden away by the blanking plate and we take out the hammer assembly, which it turns out when cocked and fired to get the valve stem out had shot past it’s normal point and jammed itself in the forward position, hence why our bolt knob was stuck. Now the spring pressure from behind the hammer was relieved, we could free the bolt knob and the hammer with ease.
Well, we would be able to if the trigger assembly wasn’t in the way. So out that comes too.

Tap out the 2 pins holding in the trigger, none of the underside (where the actual trigger lever is) needs to be touched.
Once these pins are clear, the whole trigger assembly should fall out, and thus releasing our stuck hammer.
Which leaves us with these hammer pieces:
Hammer assembly
The order shown in the picture above is the correct order (as we found out by trying the wrong order ourselves after the parts fell out onto the floor…)
Reassembly
Reassembly at this point was a reversal. We put the hammer assembly in the back of the rifle and tightened up our now non-anti-tamper back plate.
We put in the valve sleeve (the white marking is a god send, seriously, if yours isn’t already tip-exed (white-outted) then do it. And then put the valve stem in place (do not force the valve stem, you may bend it, rendering it useless), followed by the spring, cork-looking-cap and then the front block piece.
Now to fix the actual leak of the rifle, which was coming from the regulator was to replace the seals on the regulator.
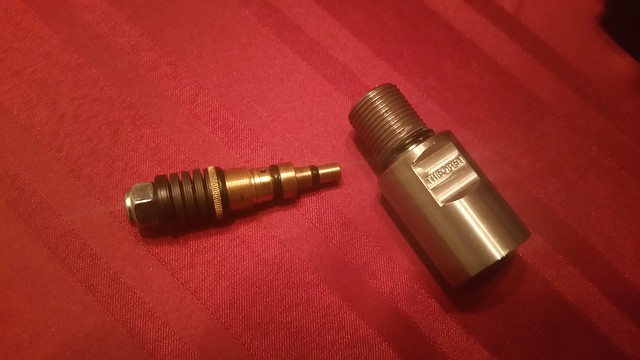
Regulator separated from socket
There are 3. From the left we have a Nylock bolt, a plastic retaining washer, 14 or so spring washers. Brass thumbscrew which the first seal is attached to (this O-ring, like all the O-rings had been on since the rifle was new, over 10 years, it had gone hard and was not producing a good seal. then the body of the regulator has 2 more O-rings in descending size, again, these 2 seals had gone hard and brittle. They were not producing a good seal.
All of these were replaced. (It’s worth noting that we took this part apart, which it is definitely not necessary to replace these seals – you live and learn). the regulator was put back together and tightened to the “Socket” (part with Theoben on it, 21mm socket sized) and the seal on this was replaced and greased also.
It was all put back onto the block and we attached the buddy bottle. No Leaks! Sounds promising! So I dry fired the rifle (scared my mother half to death who was watching Eastenders or something equally mind-numbing on TV) and it fired with much gusto.
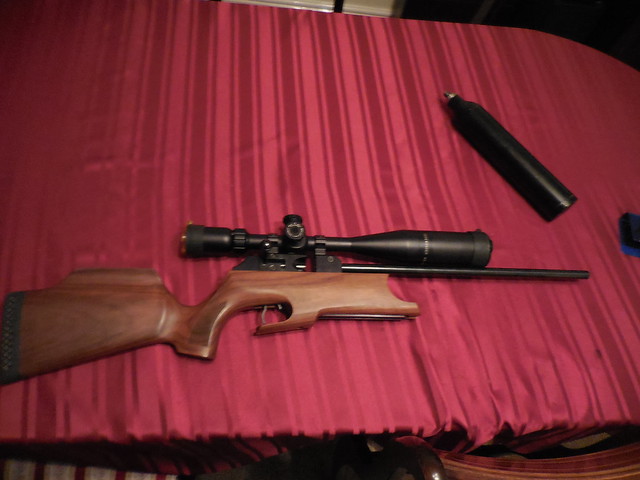
Completion
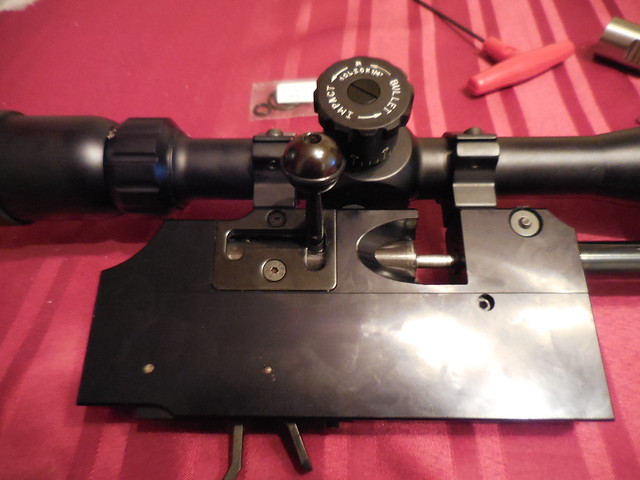
The rifle was put back into it’s stock, happy that everything was tightened up and ready to go.
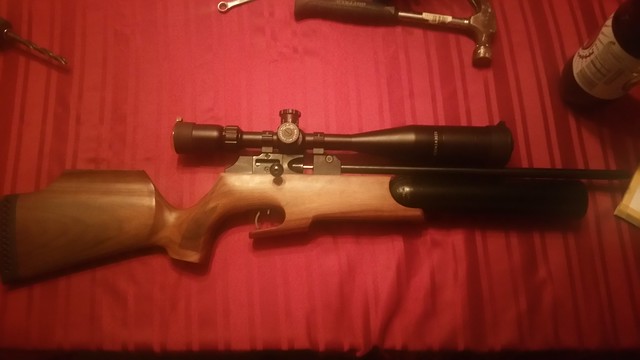
Back Together, Ready to go!
All that’s left is to take it to the range and re-zero and put up some groups at 25 yards to show what it can do.
Range Results
See my Theoben Air Rifle Results After Rebuild blog post.
Addition: 10/01/2016
The results of this rifle deteriorated, see the follow up blog regarding this and our efforts to fix it on Theoben Rapid S Repair blogpost.


3rd October 2016 at 1:03 pm
Hi, on the hammer parts photo it looks like the part with the tiny spring attached is the wrong way round.
What tool did you use to remove the reg from its housing, on my reg, it has two pin holes, needle nose pliers or something else.
Thanks for your time.
Cheers,
Brian.
3rd October 2016 at 4:07 pm
Hi Brian,
It’s entirely possible that one of the pieces on the photograph is the wrong way around as shortly after they were released, the contents of the assembly went flying over the floor!
I’m trying to think back to what we used and honestly, I can’t quite remember. Chances are it was a pair of mole grips, but equally it could have been some snap ring pliers or similar.
Sorry I can’t be more help.
Hope you get yours sorted!
Ste
4th October 2016 at 2:35 pm
Hello Ste,
Thank you for your quick reply, and I must say it’s great to read your post with photos, it really helps people who would like to service their own Rapid, I take my hat off to you and bow .
The tool I was talking about is a special tool with too pins that adjusts the regulator, a guy up London makes them. It is used to set the reg at different pressures, maybe needle nose pliers will do. I will also need a reg tester.
Kind regards,
Brian.
1st December 2016 at 10:36 pm
Hi,
Great article.
Were the e-bay seals any good? I know there is a big price difference and you can spend a lot of money on seals for a Rapid and I wonder if the extra money really worth it.
Cheers
17th February 2017 at 11:16 am
Hi Nick,
Sorry for the delayed response. About 3-4 months after fitting these seals and trying to sort out the Rapid, we realised that there was an issue with the accuracy that perhaps we couldn’t solve ourselves, and took the rifle to the Airgun Doctor. The report I got back from my father of this was that the e-bay seals that we’d replaced only a few months prior had already cracked and started showing signs of deterioration. Whether this was because the seals were no good, or the grease that came with them ate at them, we’re not too sure, but if you can afford the expense I’d definitely go with the stuff from Theoben as opposed to the stuff on ebay.
Sometimes you don’t know without giving it a try.
Hope this helps,
Ste
19th October 2020 at 3:55 pm
We need to locate the safety on the Theoben air rifle for a pal
13th April 2021 at 12:47 pm
Hi Ted,
Apologies for the delay in responding. Depending on the model the safety is usually inside the trigger guard infront of the trigger shoe.
Good Luck
Ste
11th October 2022 at 11:19 am
After a shot a further air hiss noise comes from the breech.
New stem valve fitted and leak of air takes place when no shots are made.
Pellet probe settings’ adjustments can help how please?
28th October 2022 at 10:27 am
Hi, sorry, I don’t have in depth knowledge on this rifle, sounds like some O rings could have perished or been damaged on reassembly, but I’m not certain.